 After-Sales:
 EN
EN
 AR
AR
 HR
HR
 NL
NL
 FI
FI
 FR
FR
 DE
DE
 EL
EL
 HI
HI
 IT
IT
 PT
PT
 RO
RO
 RU
RU
 ES
ES
 TL
TL
 ID
ID
 SL
SL
 VI
VI
 ET
ET
 MT
MT
 TH
TH
 FA
FA
 AF
AF
 MS
MS
 IS
IS
 MK
MK
 HY
HY
 AZ
AZ
 KA
KA
 UR
UR
 BN
BN
 BS
BS
 KM
KM
 LO
LO
 LA
LA
 MN
MN
 NE
NE
 MY
MY
 UZ
UZ
 KU
KU


News
COLD ROOM INSTALLATION
Time : 2024-05-31
Hits : 1
General
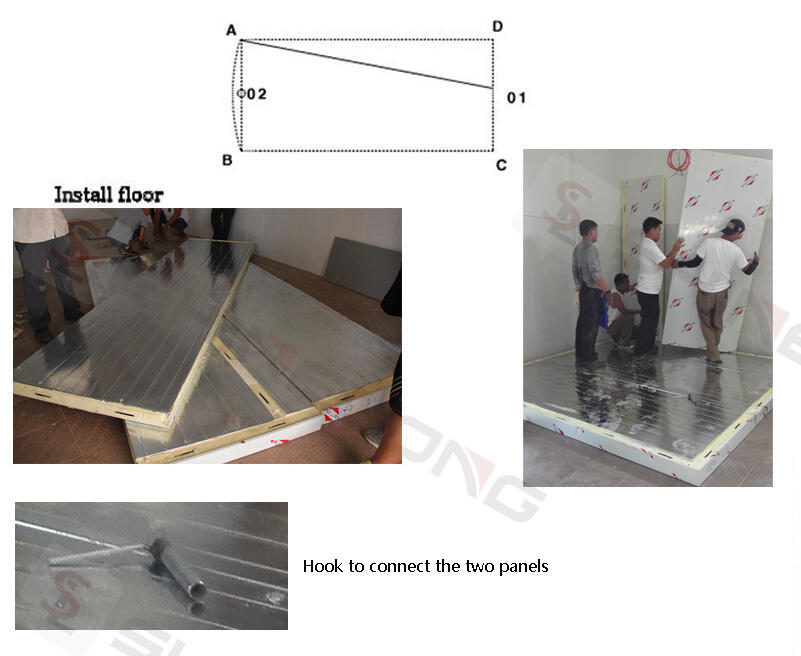
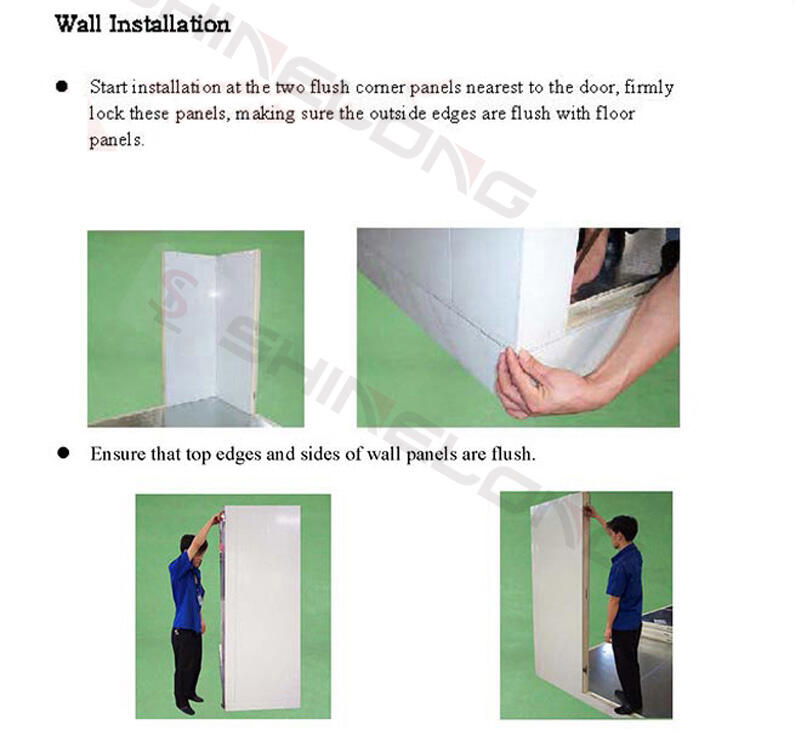
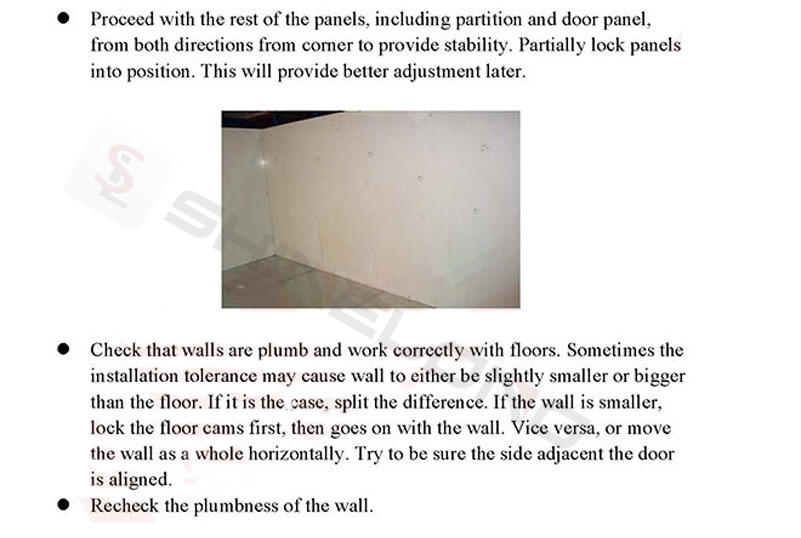
For better joining and performance of panels, the procedure stated below must be followed. Before any walk-in leaves our factory, it is test assembled and inspected. The specification tolerance of a single panel is ±1mm and the installation tolerance is ±1mm per meter. All panels have a label number. Read and follow our instructions and drawings during the installation so as to prevent bad airtight seal and improper matching. All panels are joined together from interior using a cam locking fastener, operated clockwise with a hex wrench. The first partition wall is provided with male and female cam-locking. The letters ‘ W F C D’ indicate Wall/ Floor/ Ceiling/ Door panels respectively.
Floor Preparation and Installation
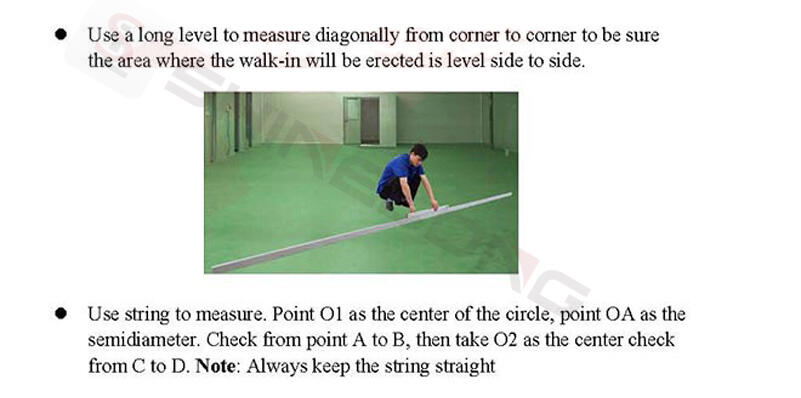
Check the levelness of the installation site and the unevenness should be confined within 5mm.
Ceiling Installation
If the walk-ins have a partition section for the ceiling, floor and wall panels, the ceiling panels should be installed with the “Tee” Section first, them work toward the ends until all the ceiling panels are installed. Once the ceilings have been installed make sure they are aligned and flush with the walls, especially with the side adjacent the door. Use the method mentioned earlier in wall installation if they do not match properly.
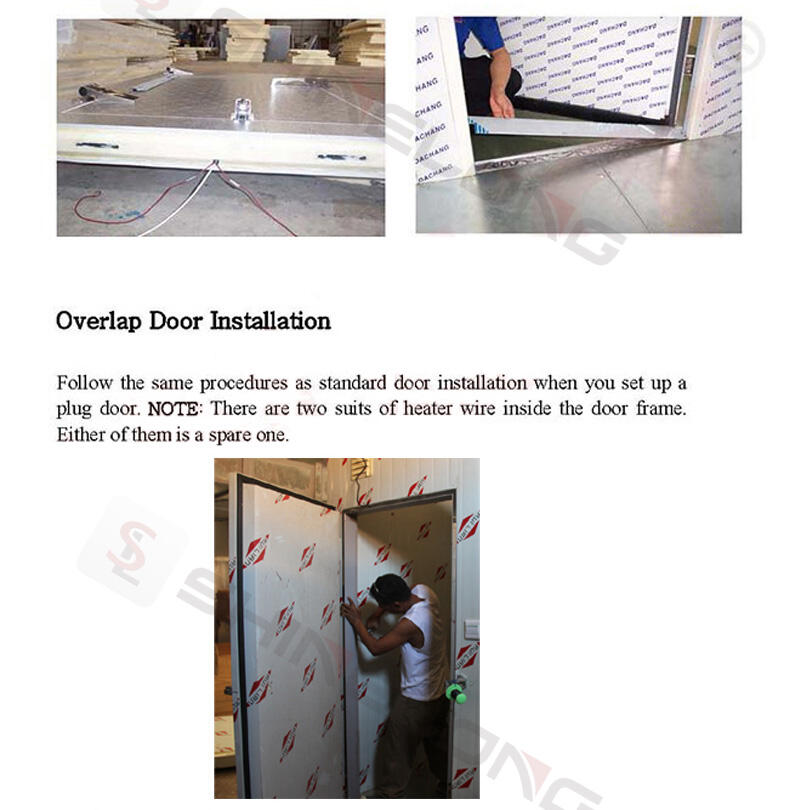
Standard Infitting Door Installation
It is the same as you work walls, except that it needs to use plumb line to verify the frame to prevent bad self-closing action. Center the L-shaped hold down brackets (which are taped to the door leaf) at the base of each door frame leg. Attach the angle bracket to the door frame leg in screws and to the floor using expansion bolts. Heater wire and lamp junction are inside the upper part of the door frame and should be routed from the wireway through the door frame into the ceiling conduit. The indication of the voltage of the wire is located at the end of the wire.
Sliding Door Installation
- Set threshold underneath the door (Cement doorsill is optional)
- Attach Header Track 1), 2) with Roller Assembly 1) to wall by inserting screws.
- Put door into the assembly.
- Attach Track 3) and Track assembly 2) to Track 2) and tighten locking nuts
- Fix the rear block.
- Secure the front block with the bottom door guide rail and firmly screw it into the threshold.
- Install door handle block and door latch.
- Adjust Nut 1) so that nut and roller assembly bolt perfectly fit. This may ensure the interval between door opening and door frame is 50mm. (the dimension is adjusted in the factory, therefore your adjustment is not necessary)
- Move both front and rear block to match the bottom door guide rail. Adjust Nut 2) and 3) for proper seal between door and frame, and door gasket and threshold should also be properly sealed. Open and close door to ensure smooth operation.
- Place heater wire into the cover above the door frame and the lower part of the heater wire should be left inside the ‘U” shape cove of the threshold. If it is cement doorsill leave a cove for heater installation.